

Solutions Manager#
The SAF SDK framework includes a Visual Studio Code extension called Solutions Manager. This extension provides a user-friendly interface for creating and managing solutions, configuring dependencies and environments, and running solutions directly from VS Code.
During the solution creation process, Solutions Manager:
Automatically installs the
ansys-saf-clipackage in the VS Code environment.Manages solution lifecycle operations through
ansys-saf-clibehind the scenes, eliminating the need for direct command-line interaction.Provides an integrated, visual workflow within VS Code, offering a more streamlined and user-friendly experience than using the command-line interface alone.
Installation#
To download and install the Solutions Manager extension:
Download the
solutions-manager-extension-v*.*.*.vsixfile for the desired release from the Releases page.Open VS Code.
Open the Extensions view by:
Clicking the Extensions icon in the Activity Bar, or
Pressing Ctrl+Shift+X.
In the Extensions view, click the More actions (three-dot) menu in the top right corner and select .
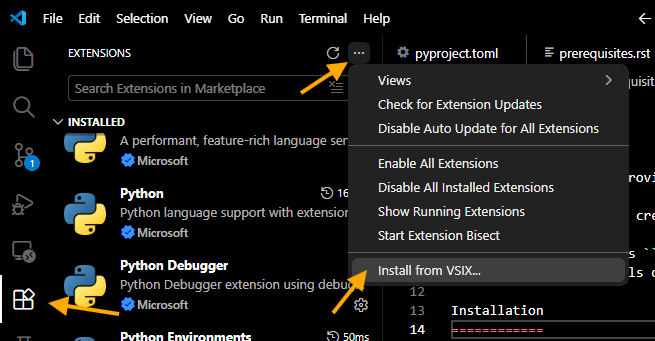
Browse to the downloaded
solutions-manager-extension-v*.*.*.vsixfile, select it, and click Install.
After the installation is complete, the Solutions Manager automatically installs ansys-saf-cli and configures the required environment. You can now begin creating and managing SAF solutions directly from VS Code.
Customization of view visibility#
You can customize which Solutions Manager views are visible in Visual Studio Code.
Available solutions view#
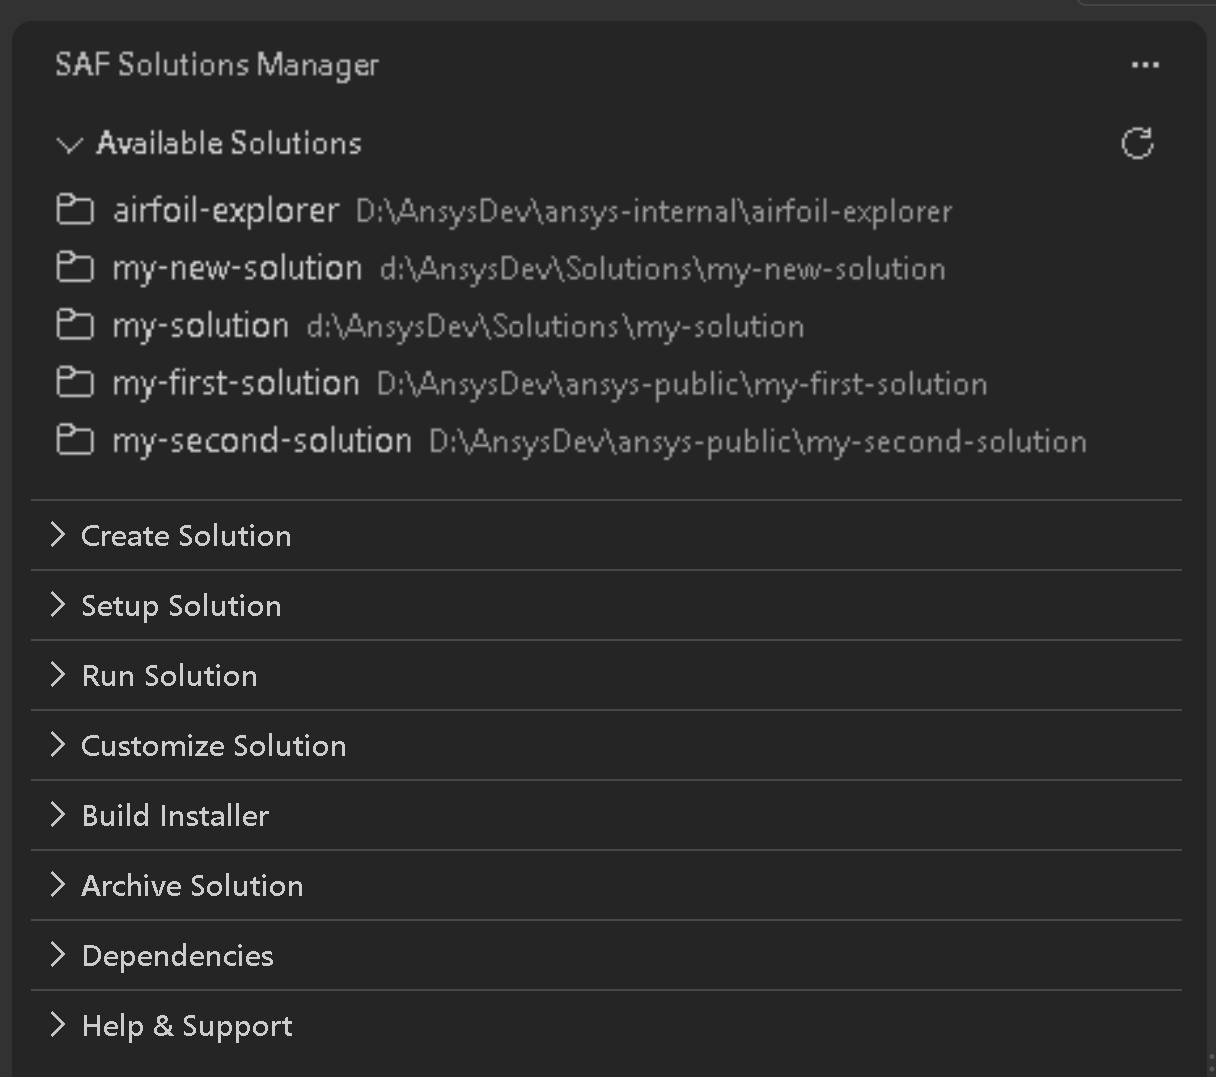
By default, the Available Solutions view is visible in the Solutions Manager pane. You can control its visibility using either of the methods in the following sections.
Note
Currently, you can customize the visibility of only the Available Solutions view.
Method 1: Use VS Code settings#
Open VS Code Settings:
Press Ctrl+, (Windows/Linux) or Cmd+, (macOS).
Or use .
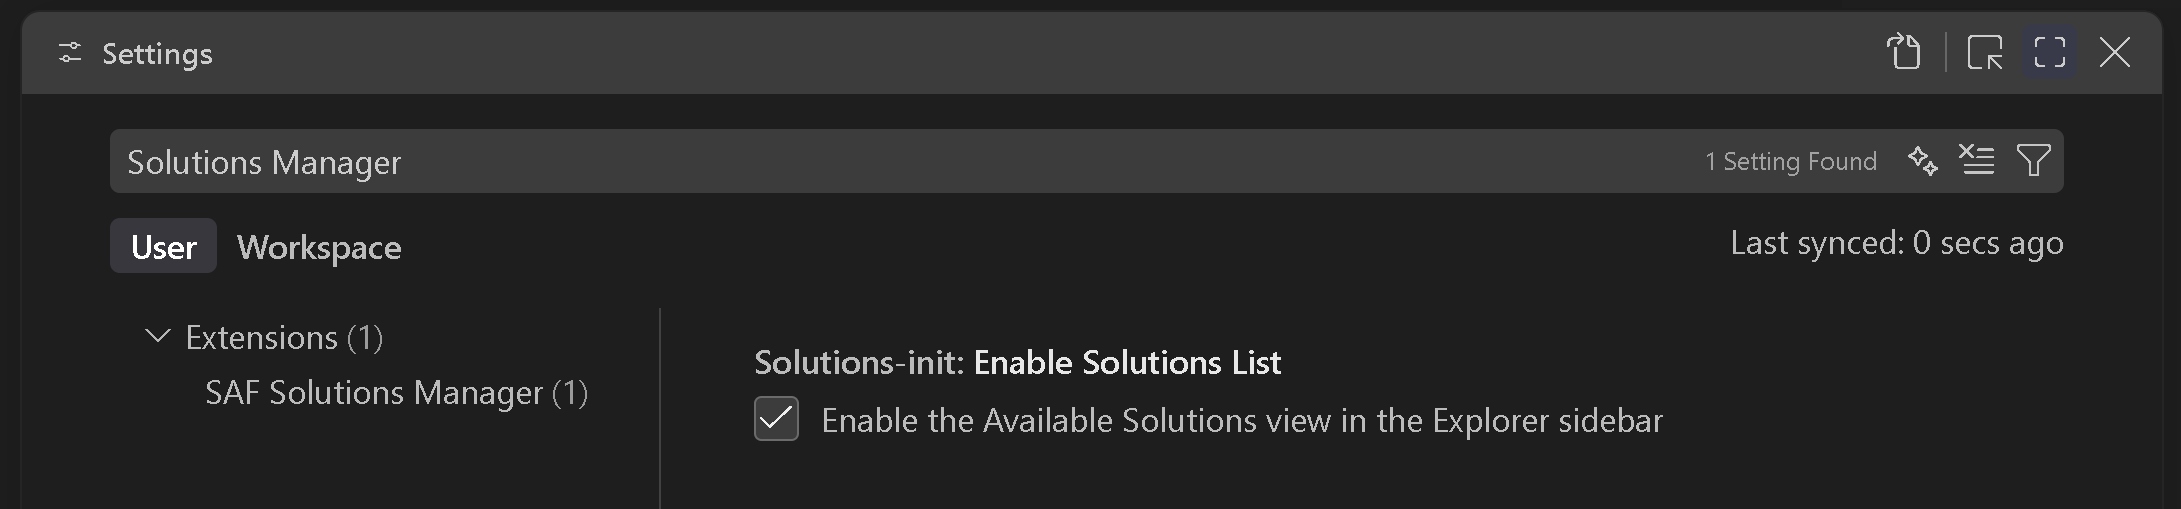
In the search bar, type
Solutions Manager.Find the Solutions Manager extension settings.
Toggle the checkboxes to show or hide the view.
Method 2: Settings JSON#
Open your VS Code user settings JSON file:
Press Ctrl+Shift+P (Windows/Linux) or Cmd+Shift+P (macOS) to open the Command Palette.
Type
Preferences: Open User Settings (JSON)and select it.
Note
Depending on your VS Code version, this command may appear as
Preferences: Open Settings (JSON)orOpen User Settings (JSON). Use the command that opens the user settings file, not a workspace settings file.Add the following entry to the existing top-level settings JSON object (do not overwrite other settings):
{
  "solutions-init.enableSolutionsList": false
}
Set the value to
trueto show the view orfalseto hide it.Use
Preferences: Open Workspace Settings (JSON)if you want to apply this setting only to the current workspace.