

Manage projects#
SAF supports and provides persistence for an arbitrary set of solution instances called projects. A solution project consists of the project data and project files.
The contents of the project data are determined by the data schema in the solution definition. Once you’ve created a project, you can use GLOW’s Client API and REST API to manipulate its contents.
Important
Do not modify or delete projects manually by directly editing or removing the project data or files, as this may invalidate the state of the project or its contents. Make sure that you perform all project operations either from the Portal or Solution UI (where applicable) or by using the development tools provided by SAF.
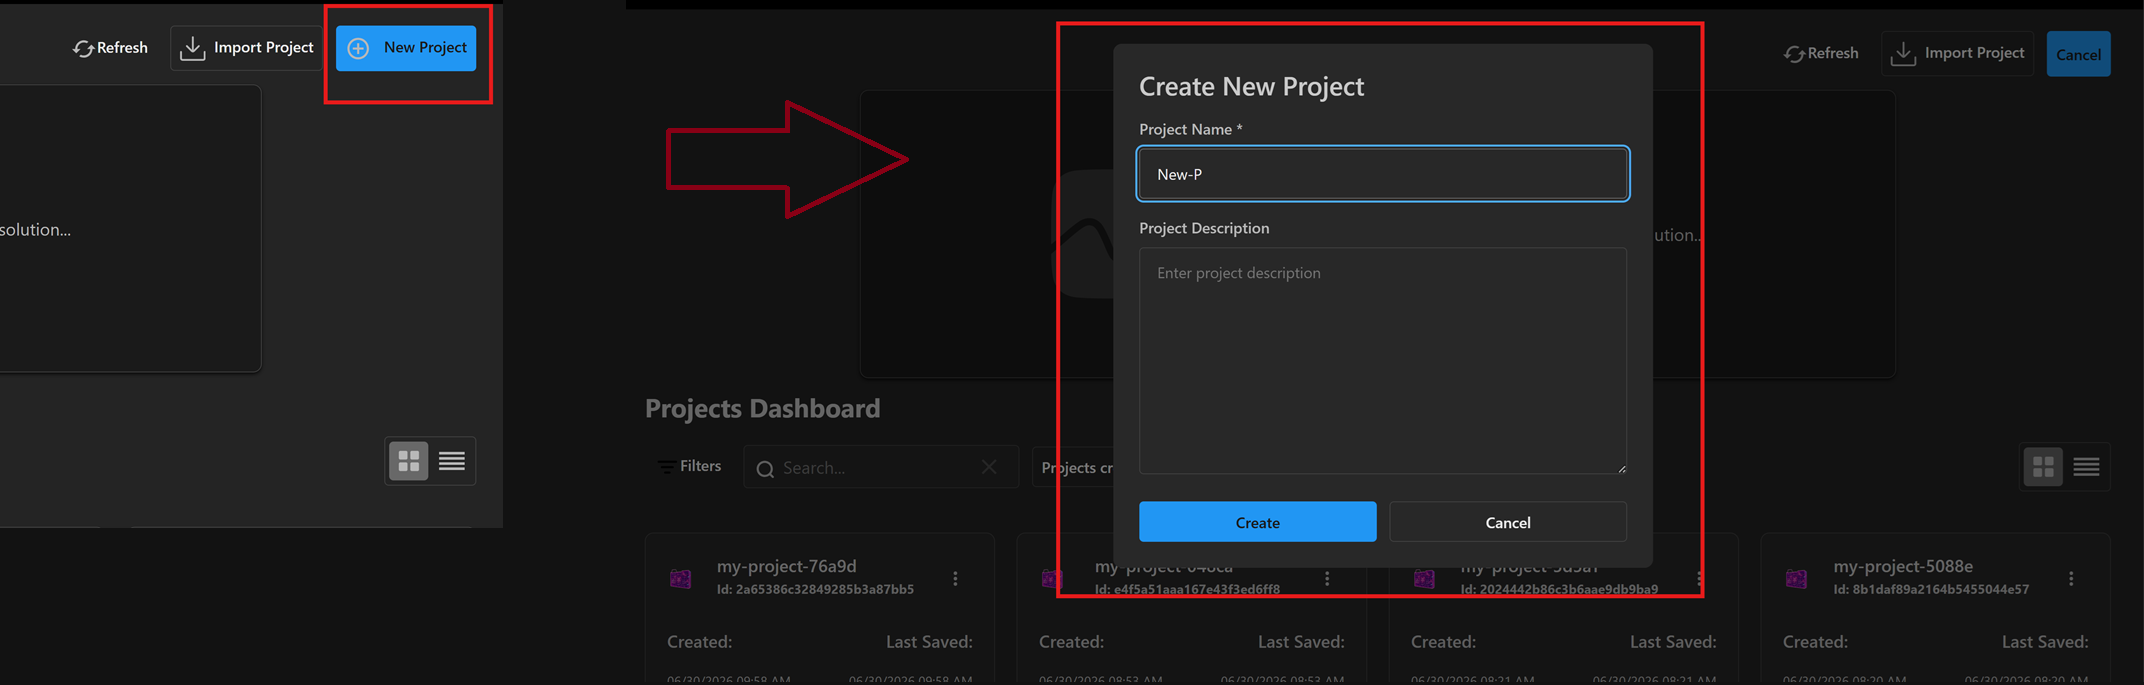
Create a project#
You can create a project either from SAF Portal or via SAF CLI.
Run the solution with the
--portaloption.Click New project.
Enter a display name for the project.
Fill the description for the project. (optional)
Click Create.
SAF Portal automatically launches the Solution UI for the new project.
Run the solution with the --project <project-name> option.
Warning
Options --portal and --project <project-name> cannot be used together.
Export/share a project#
You can collaborate with others by packaging and sharing projects. A project package (.safx file) allows you to share a complete project.
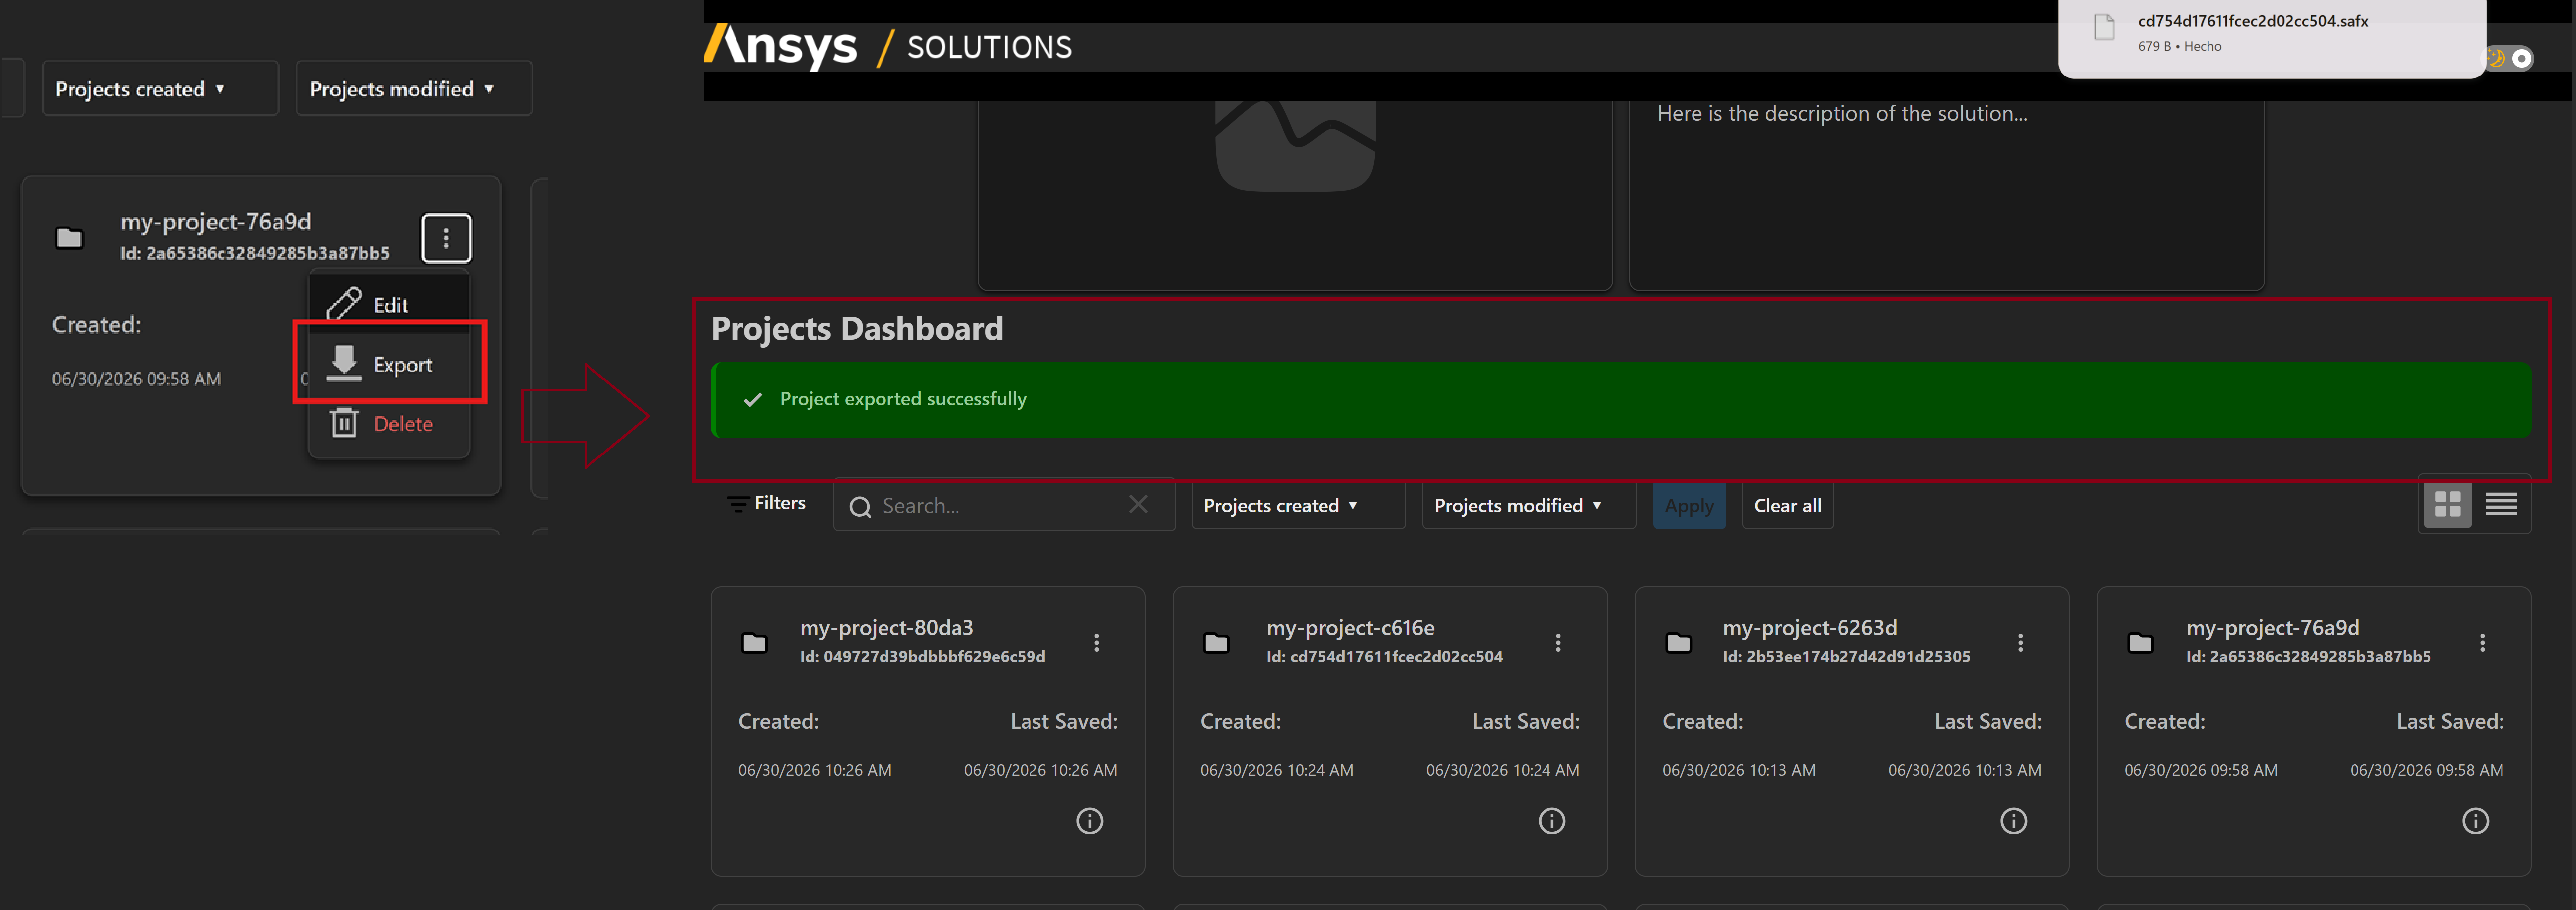
To create a .safx project package, you need to export your project using SAF Portal:
Run the solution with the
--portaloption.Find the project to export, click the button for more options and click Export.
The file is downloaded to the Downloads directory of the browser. You can share the .safx file so it can be imported by other users using SAF Portal.
Import a project package#
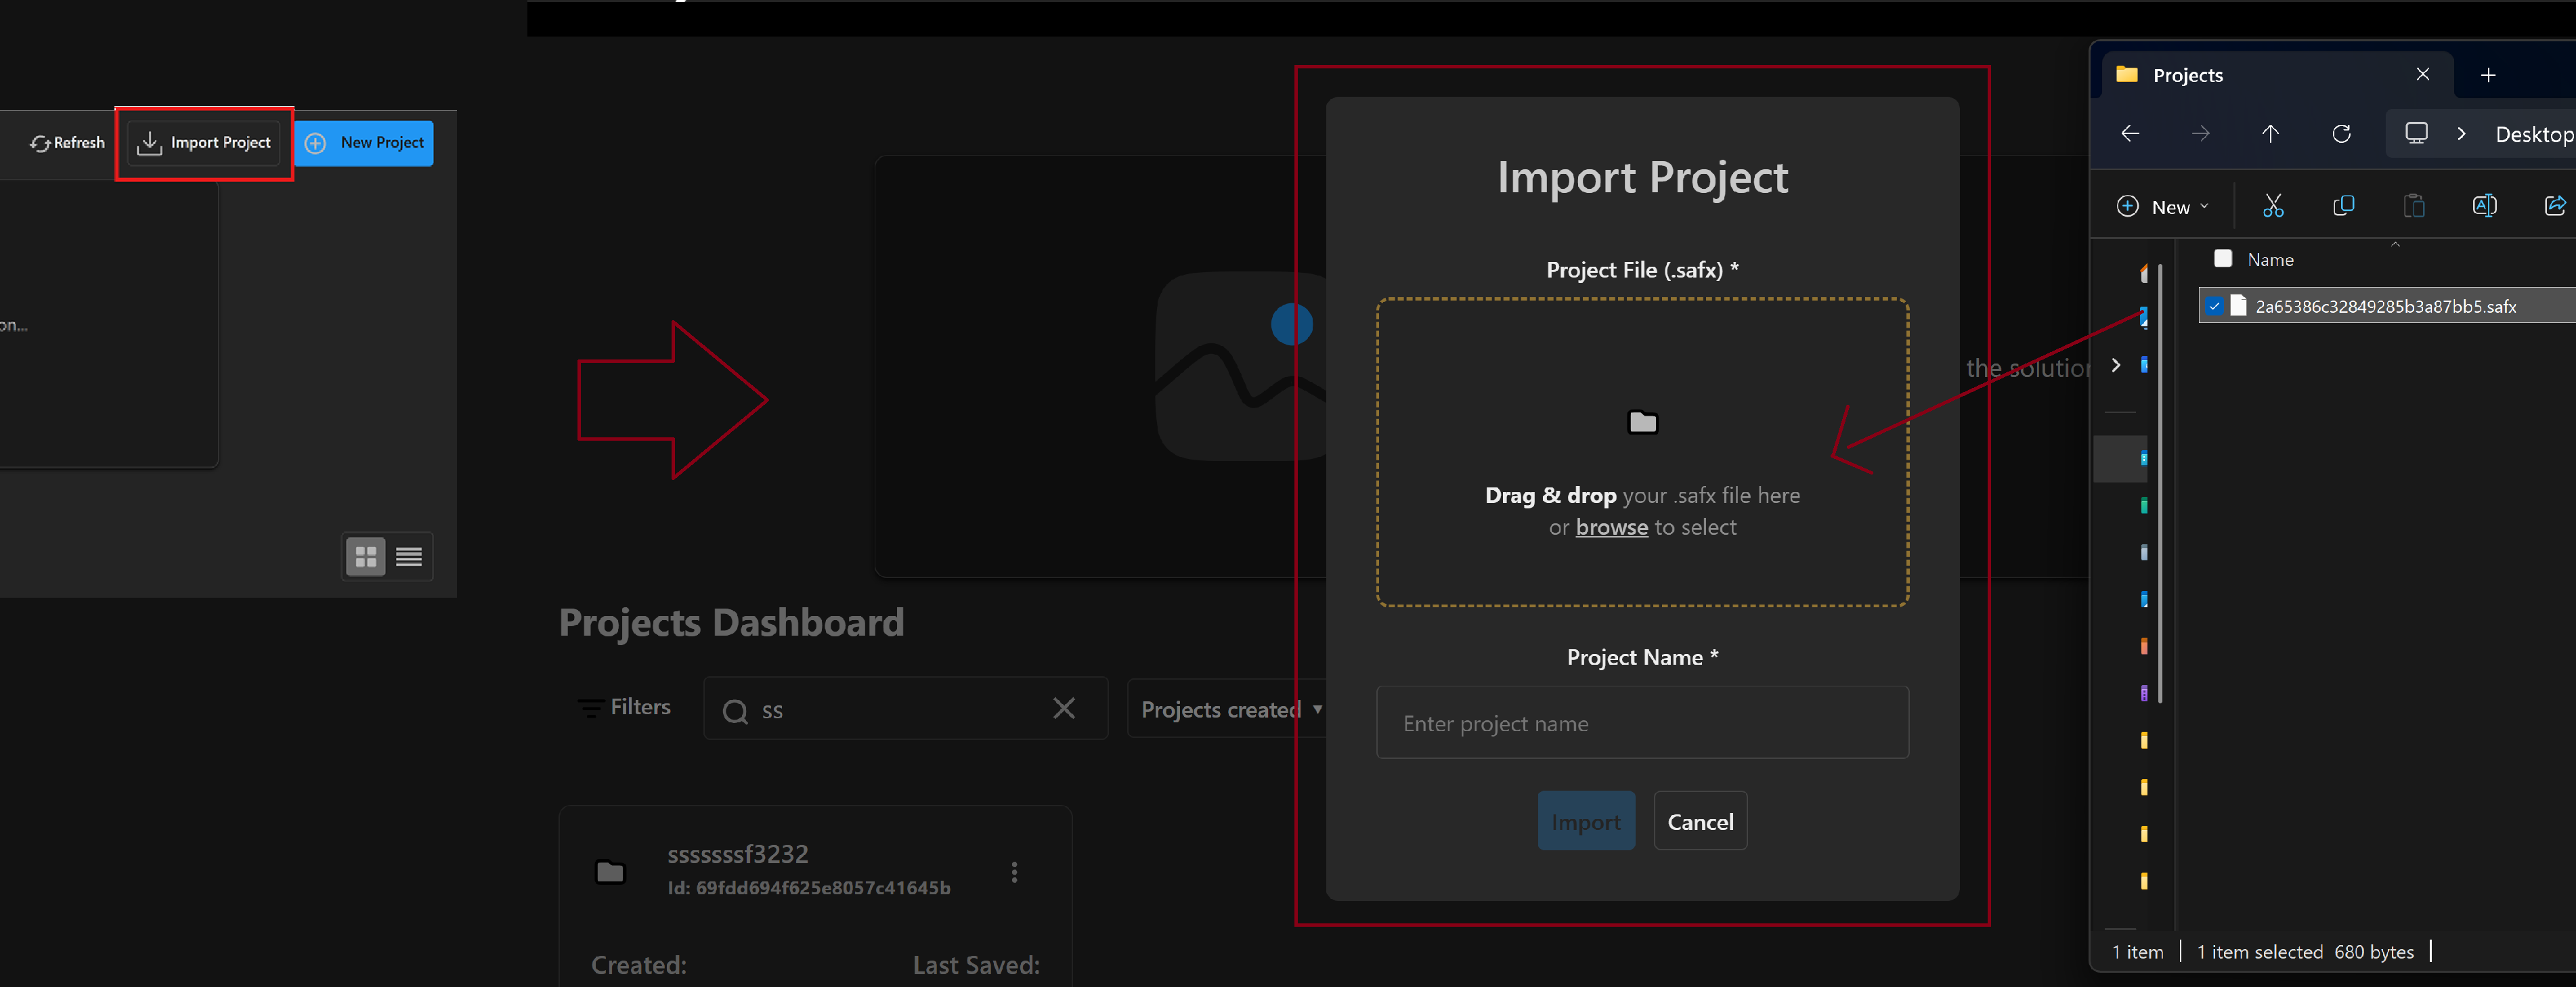
You can import a project package (.safx file) into SAF using SAF Portal.
Note
Each product instance is separated from the instance of the original project, enabling both projects (original and imported) to operate independently without any interference.
Run the solution with the
--portaloption.Click Import project.
Enter a display name for the project.
Select the
.safxfile to import.Click Import.
SAF Portal automatically launches the Solution UI for the new project.
List projects#
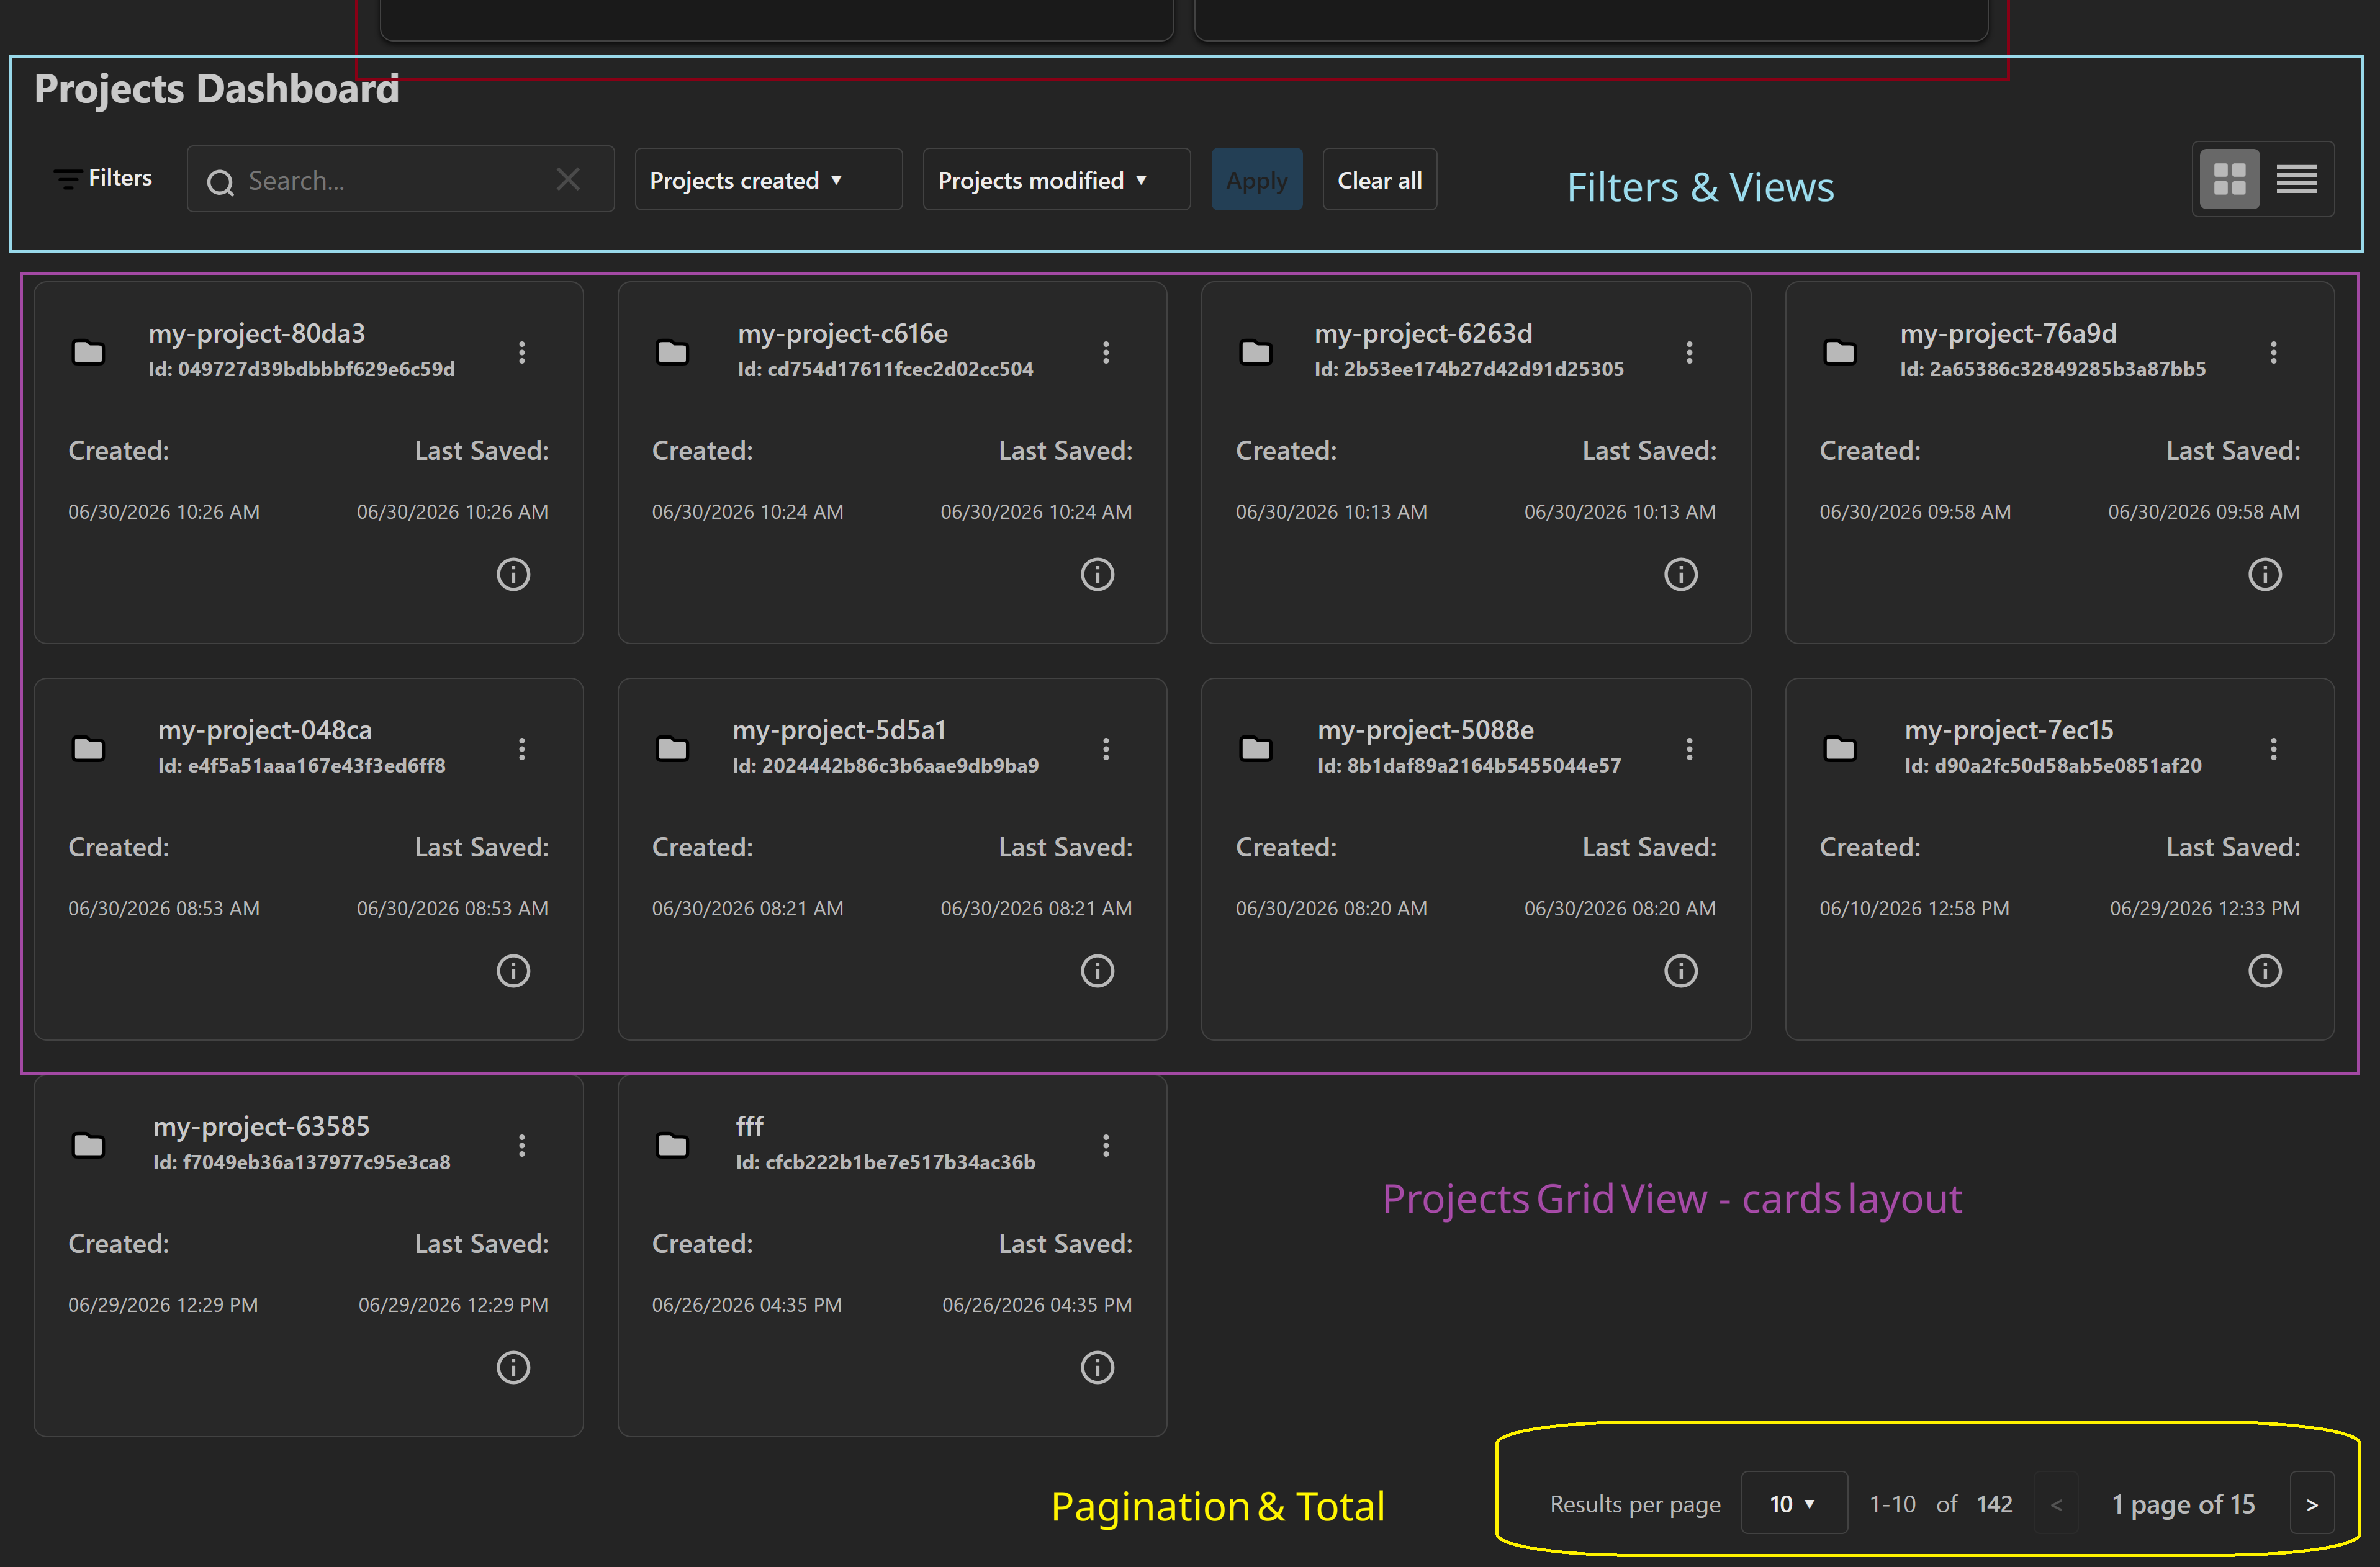
To list all existing projects using SAF Portal, run the solution with the --portal option.
Delete a project#
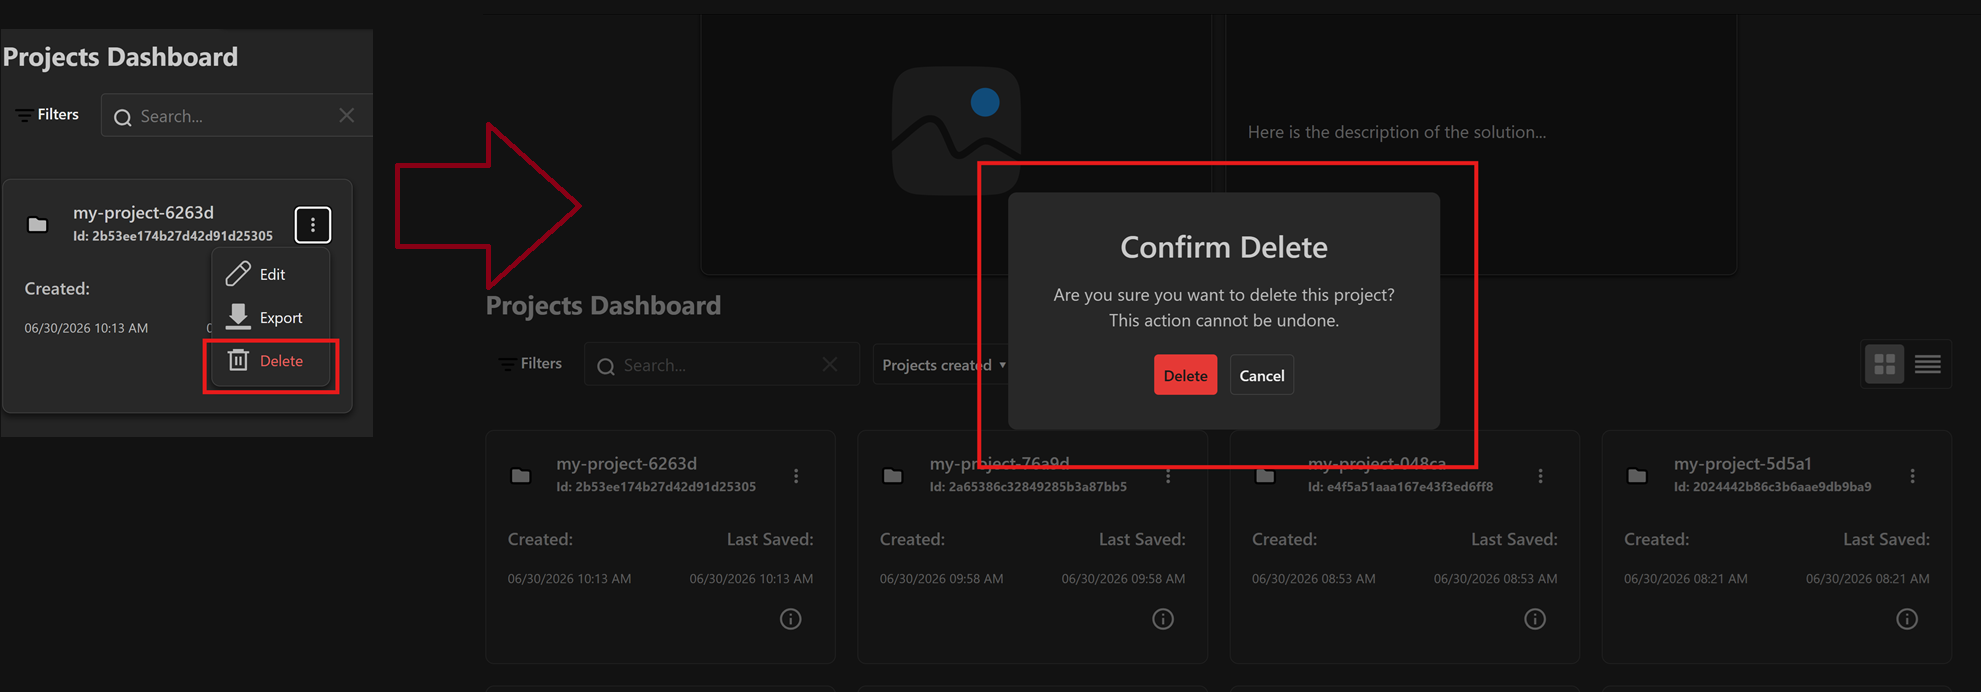
To delete a project using SAF Portal:
Run the solution with the
--portaloption.Find the project to delete, click the button for more options and click Delete project.
When asked for confirmation, click Delete.
Upgrade a project after modifying the solution#
After modifying the solution, you may need to upgrade the existing projects before you continue using them. You can do this using SAF Portal.
Run the solution with the
--portaloption.Find the project to upgrade and click on it to open it.
When asked to confirm the migration, click Migrate.
The project is now upgraded and SAF Portal automatically redirects you to the Solution UI for the project.
Supported modifications#
Project upgrade optional#
These modifications do not trigger an error if the project is used before being upgraded.
Note
You are recommended to upgrade the project, nonetheless.
Modifying the solution display name
Modifying the solution version
Adding/removing transactions
Modifying the default value of a step field
Modifying the validator of a step field: only allowed if the current field value passes the new validator.
Modifying the signature of a transaction (function parameters and download/upload fields).
Project upgrade required#
These modifications do trigger an error if the project is used before being upgraded.
Adding/removing step fields
Adding/removing steps
Modifying the type of a step field (only allowed if the old and new types are casteable—for example, from
inttofloat)
Note
Renaming a step or a step field is equivalent to removing the old one and adding a new one. Therefore, old values are not retained, and the new step or step field is initialized with its default values.
Unsupported modifications#
These modifications render the project unusable. If made, the project cannot be upgraded and becomes inoperable.
Modifying the validator of a step field when the new one invalidates the current field value.
Modifying the type of a step field: if the current field value cannot be cast to the new type (for example, from
strtoint).
Project Icons#
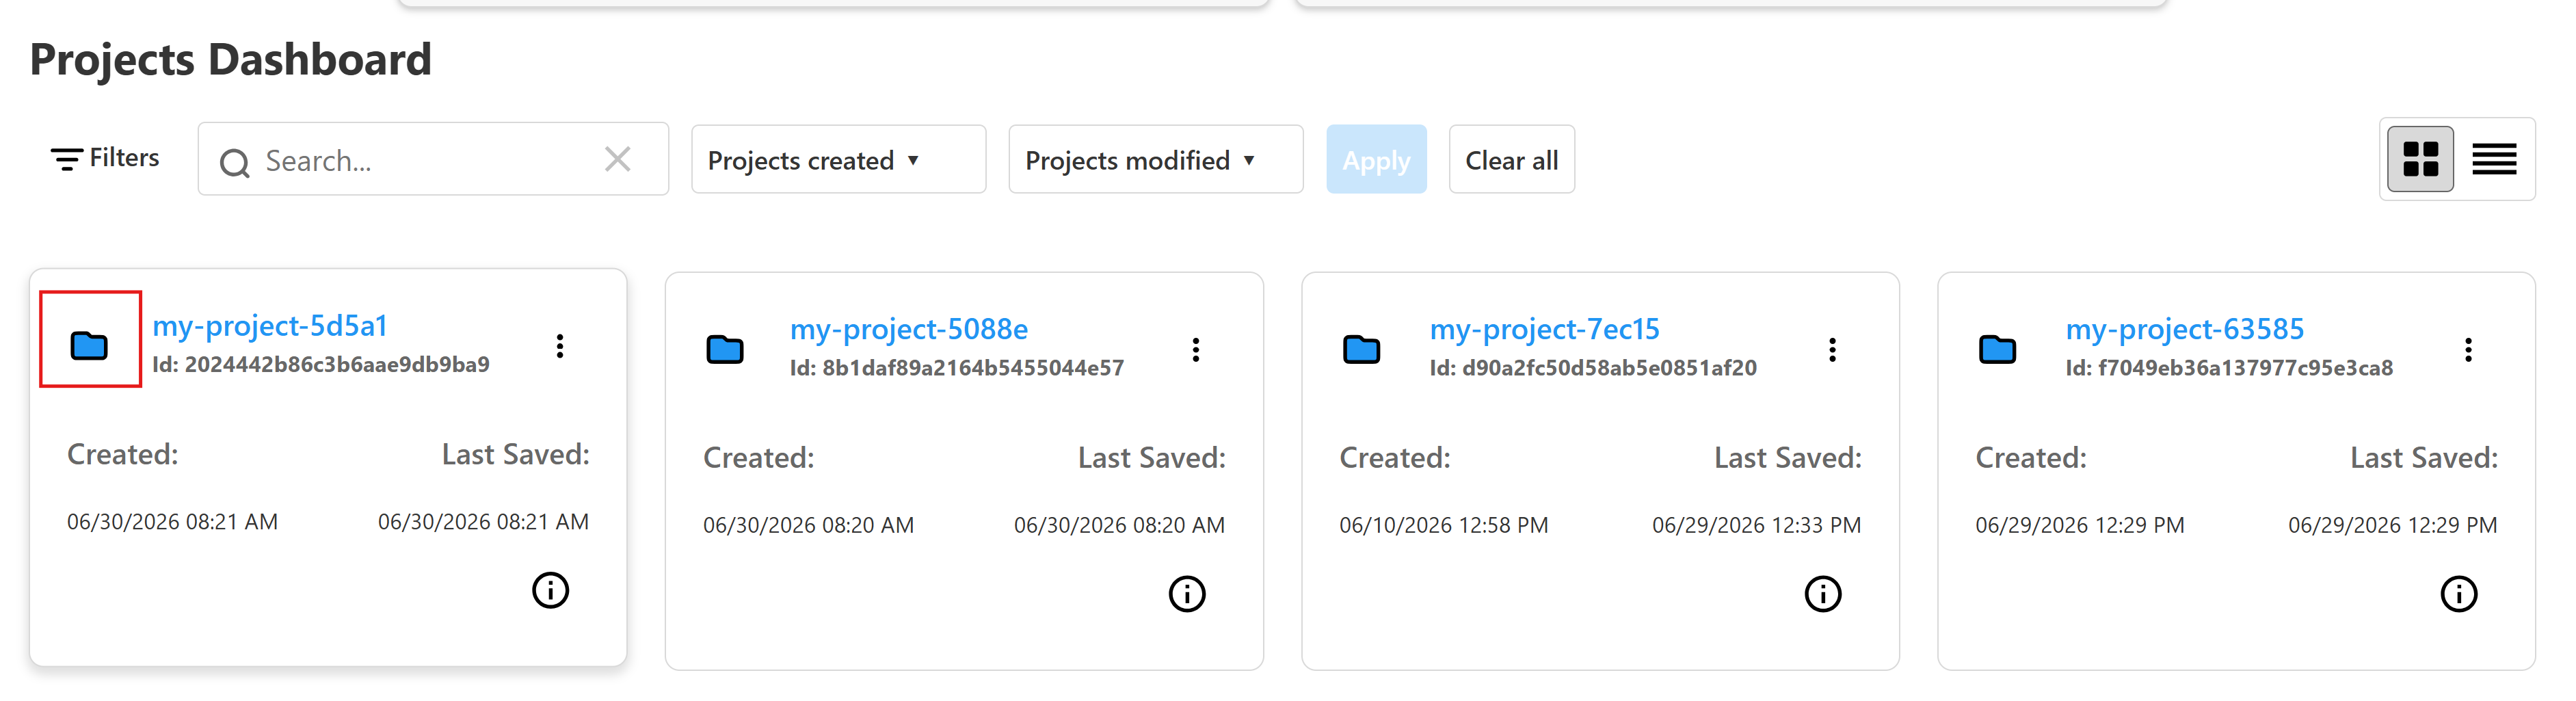
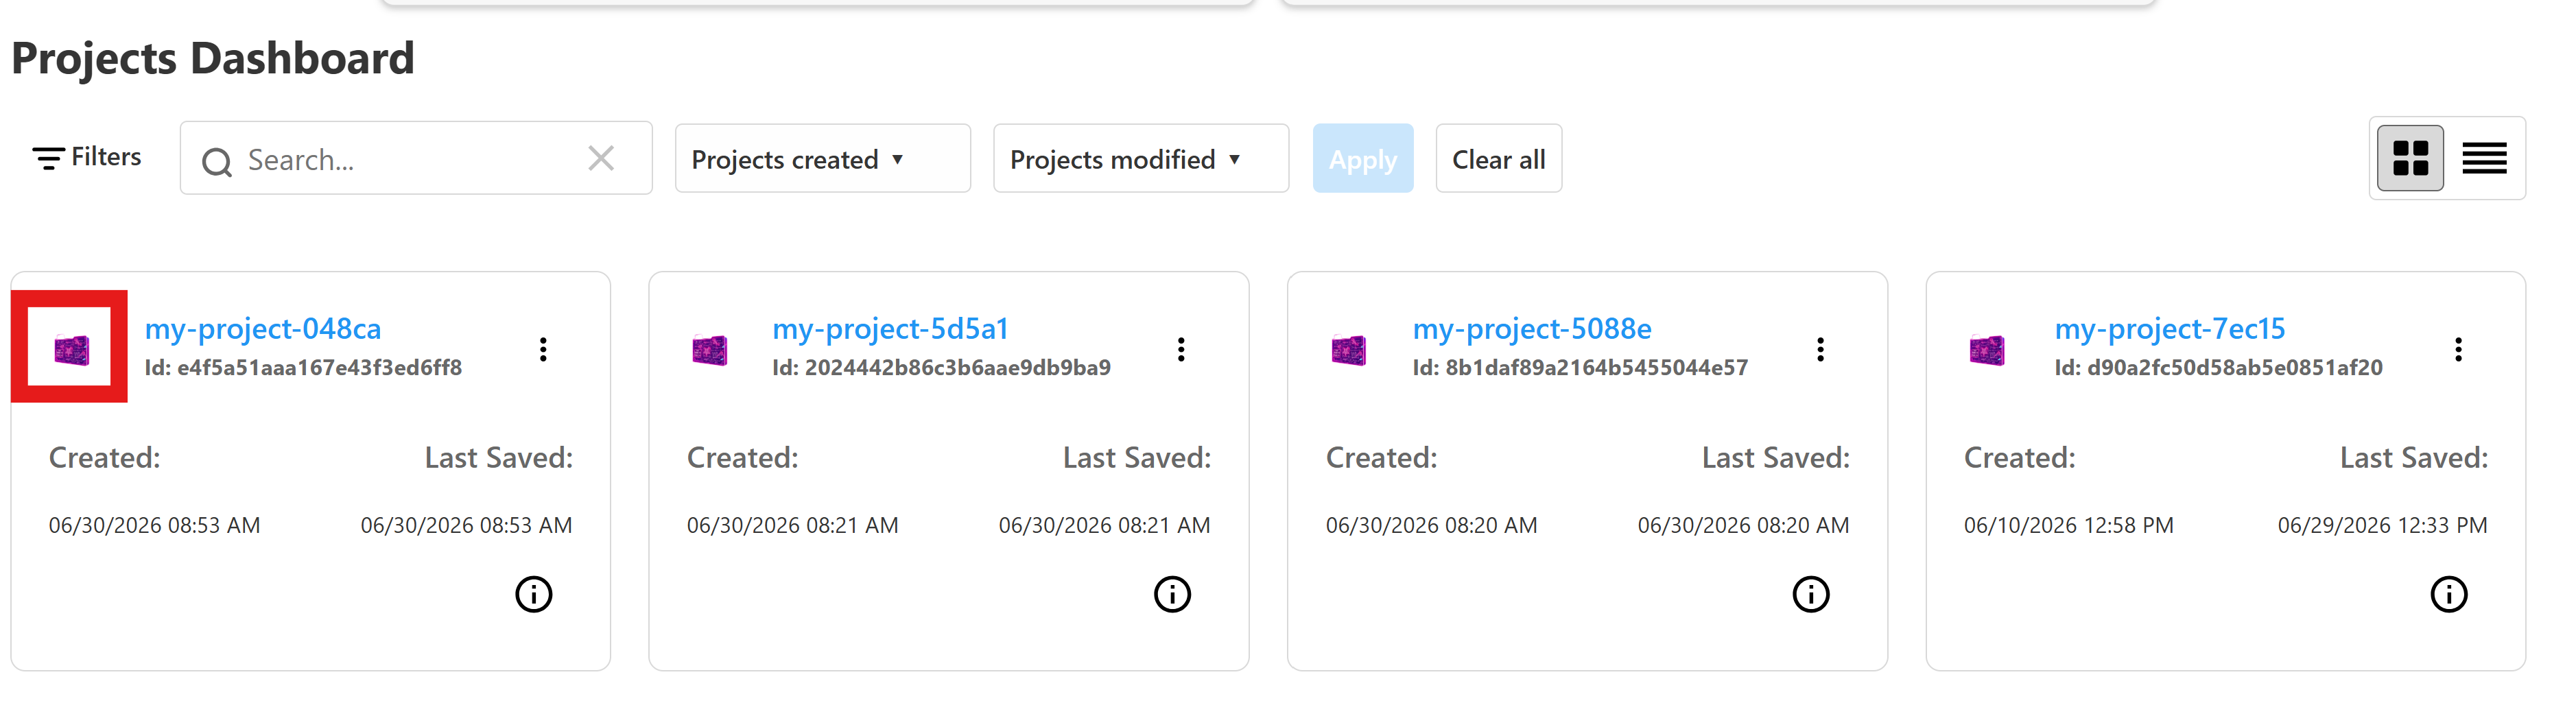
Project card icons are resolved using this order of precedence:
project.icon from the project payload
projectIconUrl from component properties
Bundled inline SVG fallback icon
If an external icon URL fails to load, the dashboard falls back to the bundled inline SVG icon automatically.
return html.Div(
    [
        ansys_saf_projects_dashboard.ProjectsDashboard(
            id="projects-dashboard",
            apiBaseUrl=API_BASE_URL,
            # solutionImageUrl='<my_path/assets/image.application.svg>',
            # solutionDescription='My solution description...',
            # Optional: point to a Project specific icon served by Dash
            projectIconUrl="/assets/project.svg",
        ),
    ]
)
The image container uses a responsive 16:9 aspect ratio.
Default project placeholder
Custom project icon
Projects Metadata#
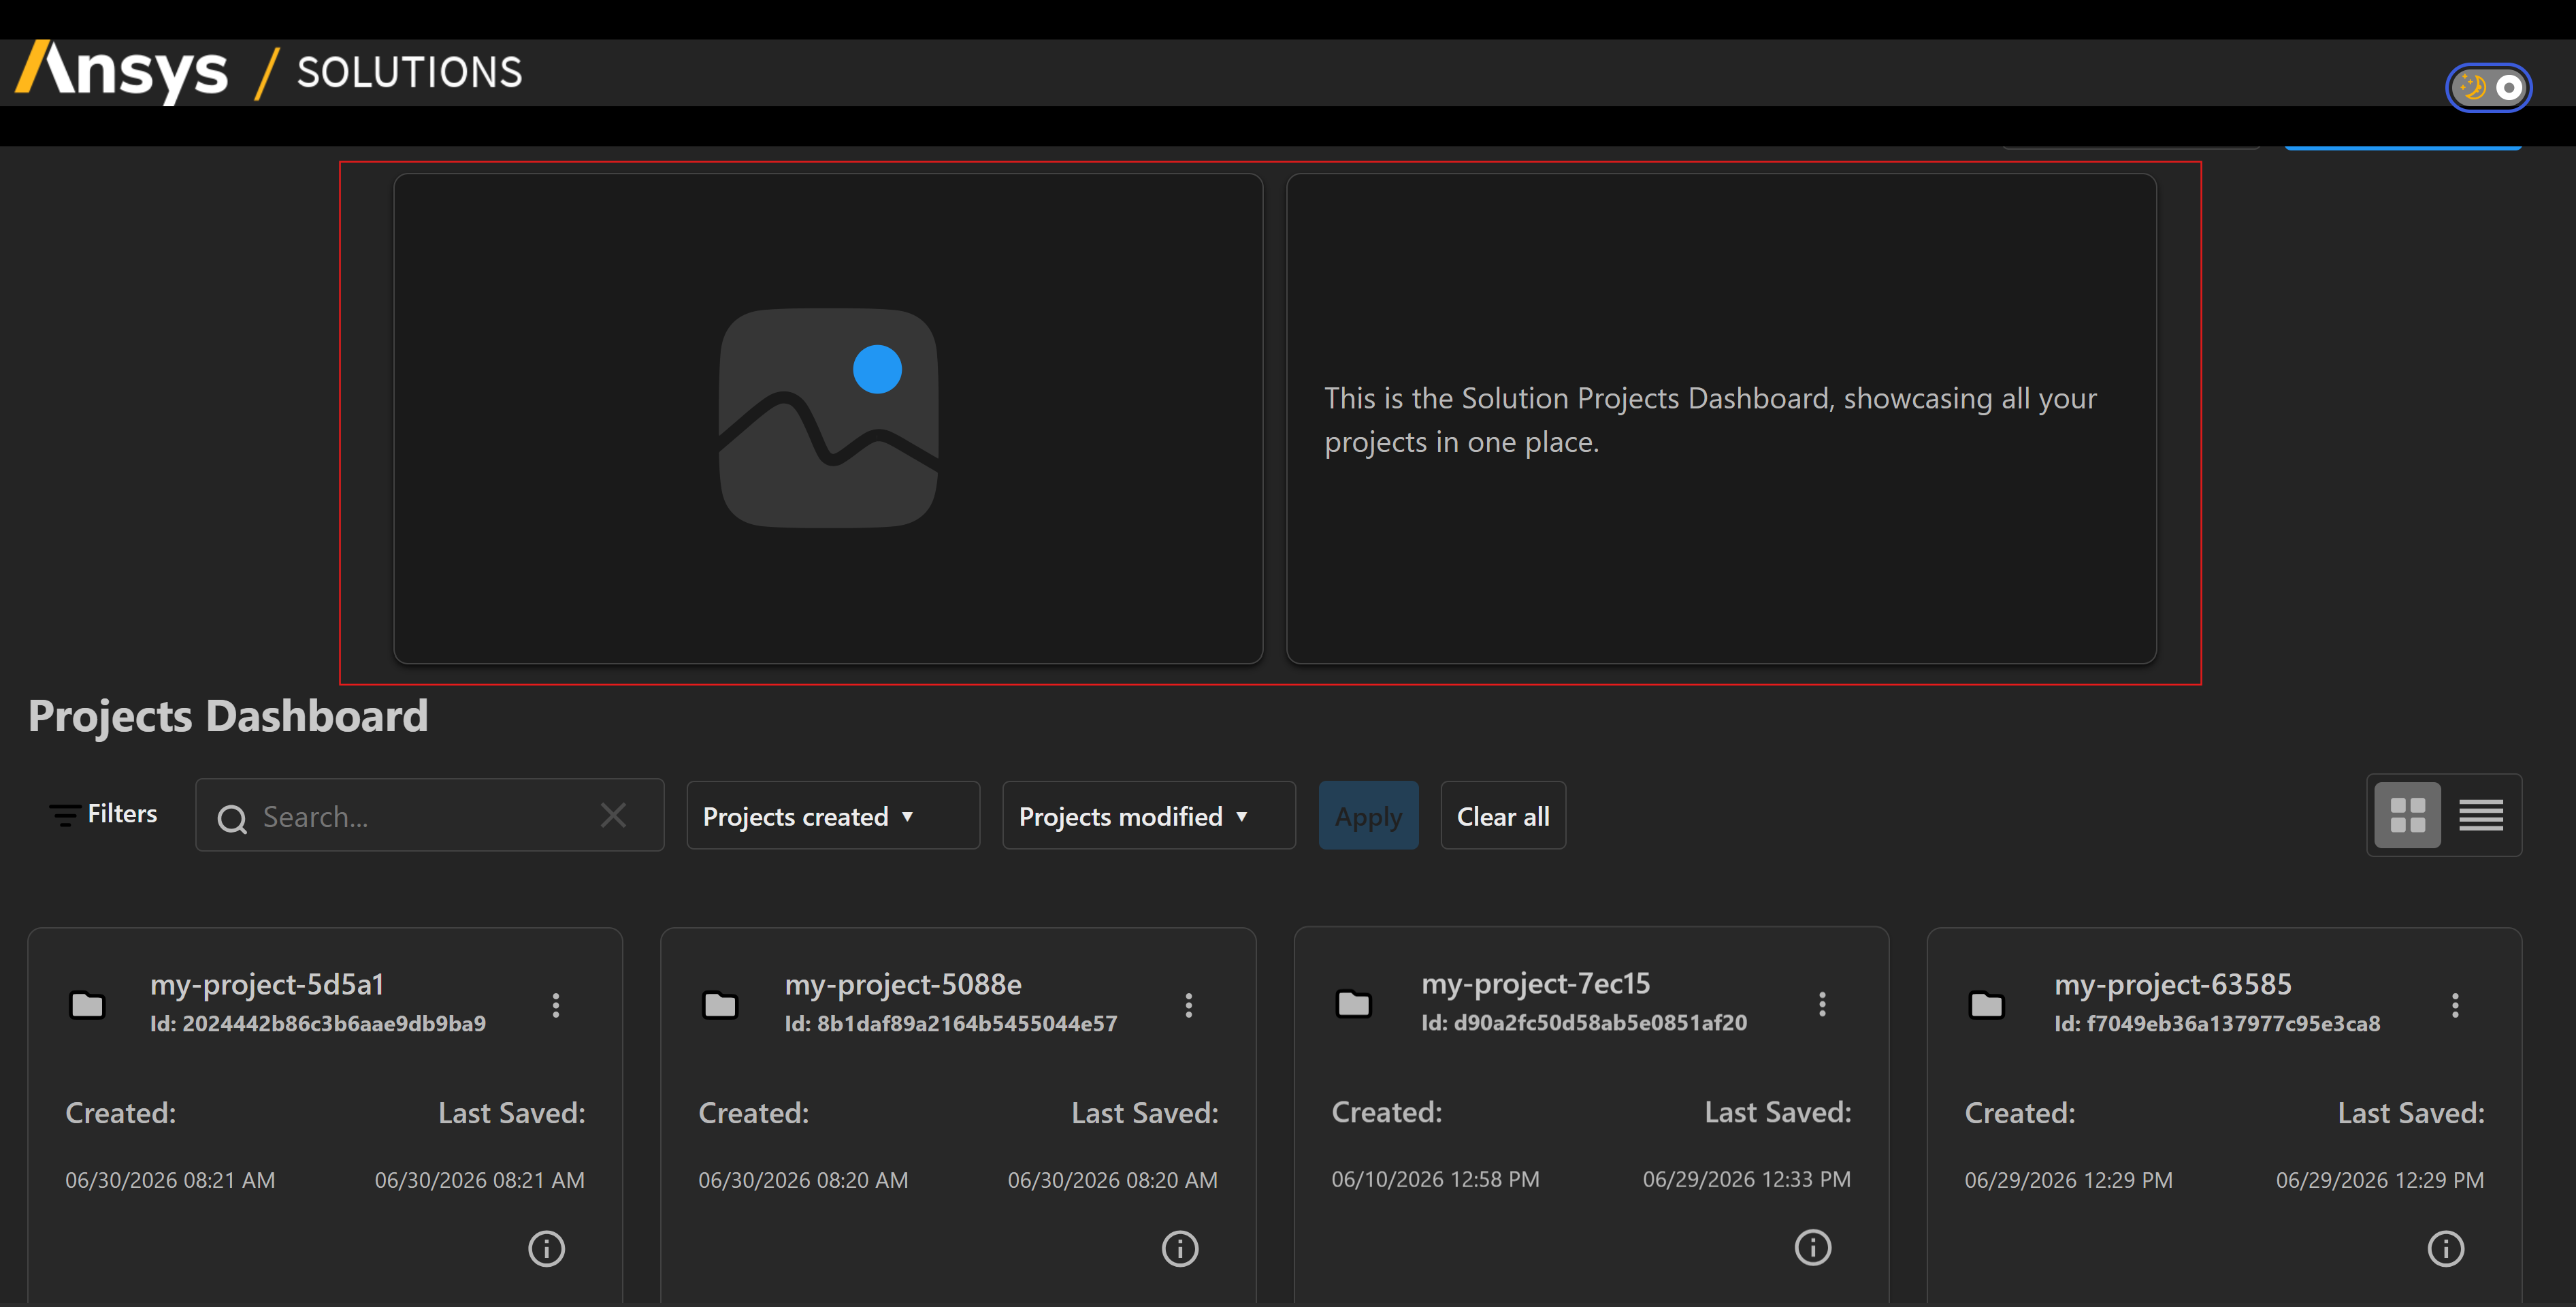
The solution header displays image and description content above the project list.
Image behavior:
Uses solutionImageUrl when you want to load a custom image of your solution.
If there is no image path provided, falls back to bundled inline SVG if omitted or load fails.
Description behavior:
Uses solutionDescription when you want to add a custom description of your solution.
Falls back to a default placeholder when omitted
return html.Div(
    [
        ansys_saf_projects_dashboard.ProjectsDashboard(
            id="projects-dashboard",
            apiBaseUrl=API_BASE_URL,
            # Optional: solutionImageUrl & solutionDescription shown above the header
            solutionImageUrl="<my_path/assets/image.application.svg>",
            solutionDescription="My solution description...",
        ),
    ]
)
The image container uses a responsive 16:9 aspect ratio.
Default metadata placeholders
Project files location#
By default, the project folder for storing the project files is created in %APPDATA%/ansys/glow/SOLUTION_NAME/project_files.
You can change the location of the project files directory by setting the GLOW_PROJECT_FILES_DIRECTORY environment variable. For example, the following code sample causes SAF GLOW Engine to store the project files in D:/my_project_files/ directory.
$env:GLOW_PROJECT_FILES_DIRECTORY="D:/my_project_files"
Warning
Do not move or modify project files manually. Doing so may lead to data loss or unexpected behavior.